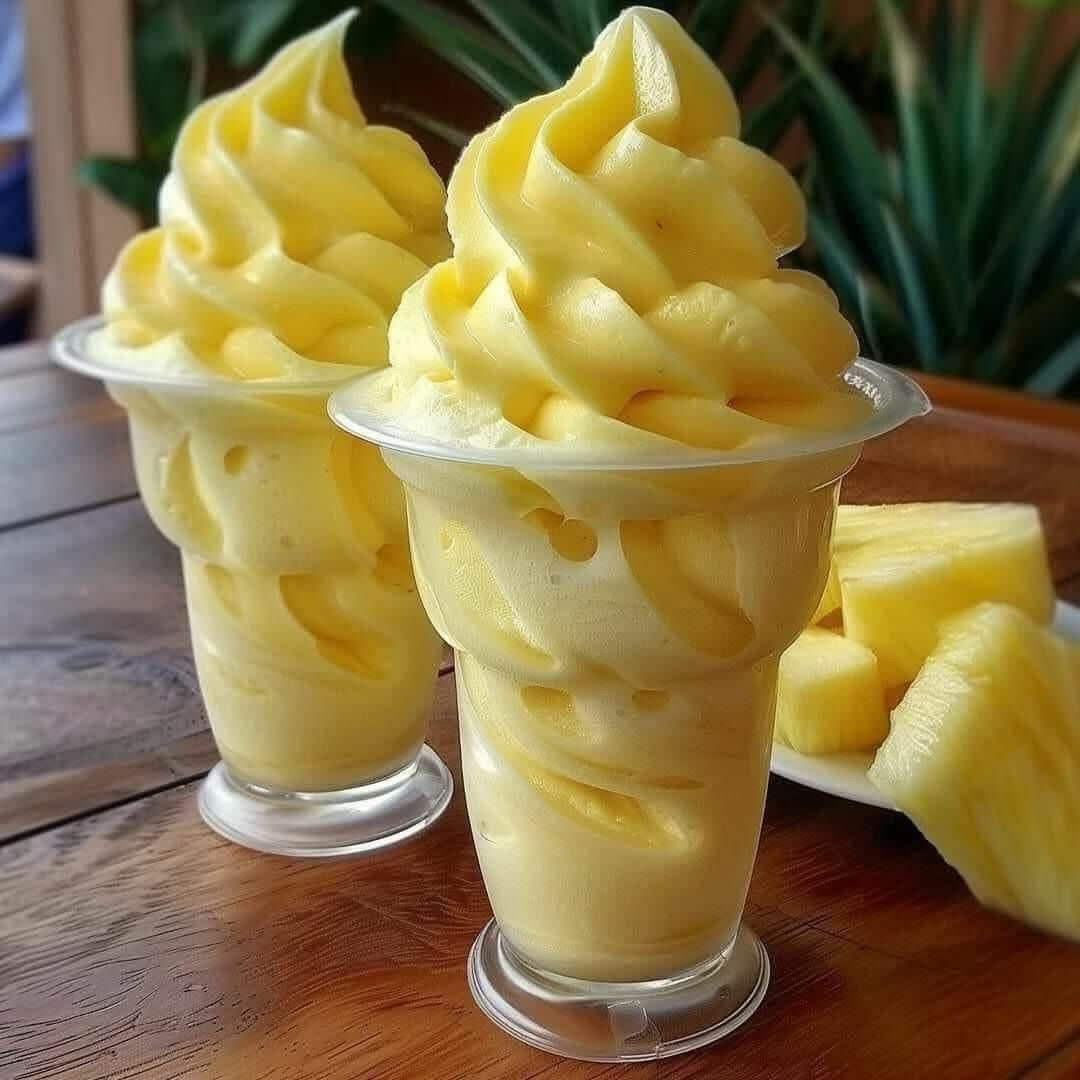
Of course! Homemade pineapple soft-serve is a refreshing, fruity, and deceptively simple treat. The best part? You don’t need an ice cream maker for the most popular method.
The classic way to achieve that perfect soft-serve texture is by using frozen pineapple to create a “nice cream.” Here are a few methods, from the easiest to a more traditional dairy-based version.
Method 1: The Classic 2-Ingredient Dairy-Free “Nice Cream”
This is the fastest, healthiest, and most popular method. It’s vegan, dairy-free, and tastes incredibly pure and fruity.
Ingredients:
· 1 large pineapple, peeled, cored, and chopped
· 2-3 tablespoons of canned coconut milk (full-fat for creaminess) or any other milk (optional, for blending aid)
· Optional Add-ins: 1-2 tbsp honey or maple syrup (if your pineapple isn’t very sweet), a squeeze of lime juice, a handful of frozen mango.
Instructions:
1. Prep and Freeze: Spread the chopped pineapple in a single layer on a baking sheet lined with parchment paper. Freeze for at least 4-6 hours, or until completely solid. (This prevents a big clump that’s hard to blend).
2. Blend: Place the frozen pineapple chunks in a high-powered blender or food processor.
3. Pulse and Blend: Start pulsing, then blend on high. The pineapple will first break down into a crumbly texture. Scrape down the sides as needed.
4. Add Liquid (if needed): If your blender is struggling, add a tablespoon of coconut milk or another liquid to help it along. Be patient! It will take a few minutes of blending and scraping for the magic to happen.
5. Watch it Transform: Suddenly, the crumbles will whip up into a smooth, creamy, soft-serve consistency. It’s a fantastic transformation!
6. Serve Immediately: Enjoy right away for the perfect soft-serve texture. It’s best fresh.
—
Method 2: Creamy Coconut Pineapple Soft-Serve
This version is a bit richer and creamier, with a stronger coconut flavor.
Ingredients:
· 3 cups frozen pineapple chunks
· ½ cup full-fat canned coconut milk (chilled)
· 2-3 tablespoons honey, agave, or maple syrup
· 1 teaspoon vanilla extract (optional)
Instructions:
1. Combine all ingredients in a high-powered blender or food processor.
2. Blend until completely smooth and creamy, scraping down the sides as needed.
3. Serve immediately as soft-serve.
—
Method 3: Traditional Dairy-Based Pineapple Soft-Serve
This version uses a custard base for a more classic, rich ice cream that you can churn in an ice cream maker. It will have a texture closer to commercial soft-serve after churning.
Ingredients:
· 2 cups heavy cream
· 1 cup whole milk
· ¾ cup granulated sugar
· Pinch of salt
· 5 large egg yolks
· 2 cups pineapple puree (from fresh or canned pineapple, drained well if canned)
· 1 tablespoon fresh lime juice
· 1 teaspoon vanilla extract
Instructions:
1. Make the Custard: In a medium saucepan, heat the cream, milk, half the sugar, and salt over medium heat until it just begins to steam (do not boil).
2. Temper Egg Yolks: In a separate bowl, whisk the egg yolks with the remaining sugar until pale. Slowly pour about 1 cup of the hot cream mixture into the egg yolks while whisking constantly to prevent them from curdling.
3. Thicken the Custard: Pour the egg yolk mixture back into the saucepan with the remaining cream. Cook over low heat, stirring constantly with a spatula or wooden spoon, until the mixture thickens enough to coat the back of the spoon (around 170-175°F / 76-80°C).
4. Chill: Immediately strain the custard through a fine-mesh sieve into a clean bowl. Stir in the pineapple puree, lime juice, and vanilla extract. Cover and refrigerate until completely cold, preferably overnight.
5. Churn: Pour the chilled base into your ice cream maker and churn according to the manufacturer’s instructions (usually about 20-25 minutes).
6. Serve or Freeze: For a true soft-serve texture, serve immediately. For a firmer, scoopable ice cream, transfer to a loaf pan and freeze for at least 4 hours.
Pro Tips for Success:
· Frozen Fruit is Key: For methods 1 & 2, your fruit must be fully frozen for the right texture.
· High-Powered Blender: A Vitamix or Blendtec makes the “nice cream” method incredibly easy. A food processor also works well, though you may need to scrape down the sides more often.
· Avoid Adding Too Much Liquid: Start with just the frozen fruit. Only add a tablespoon of liquid at a time if absolutely necessary to get the blades moving. Too much liquid will make it soupy.
· Sweeten to Taste: Taste your pineapple before freezing. If it’s very tart, you’ll want to add a sweetener. If it’s perfectly ripe and sweet, you may not need any.
· For a Dole Whip Copycat: The 2-ingredient method is the closest you can get at home! The key is using only frozen pineapple and being patient with the blender.
Enjoy your delicious and refreshing homemade tropical treat