Of course! Here is a fantastic, detailed recipe for homemade Raspberry Ice Cream. This recipe provides a rich, creamy custard base that perfectly balances the bright, tart flavor of fresh raspberries.
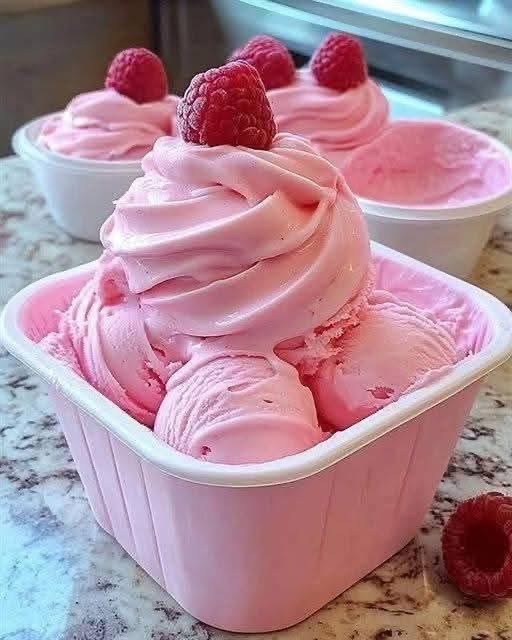
Creamy Raspberry Ice Cream
This recipe uses a classic cooked custard base (egg yolks) for the ultimate creamy texture and to prevent ice crystals. I’ll also include a simpler, no-egg variation.
—
Ingredients:
· 2 cups fresh raspberries (or frozen, thawed)
· ¾ cup granulated sugar, divided
· 1 tablespoon lemon juice
· 1 ½ cups heavy cream
· 1 cup whole milk
· 4 large egg yolks
· ¼ teaspoon salt
· 1 teaspoon vanilla extract
—
Instructions:
1. Macerate the Raspberries (Draw out the juice):
· In a bowl, combine the raspberries, ¼ cup of the sugar, and the lemon juice. Mash gently with a fork.
· Let this mixture sit for at least 30 minutes, stirring occasionally. This will create a juicy syrup.
2. Make the Raspberry Puree:
· Pour the macerated raspberry mixture through a fine-mesh sieve into a bowl to remove the seeds. Use a spatula to press down on the solids and extract as much liquid and pulp as possible. You should have about ¾ cup of puree. Set this aside.
· (Pro Tip: Don’t skip straining unless you don’t mind lots of seeds. The texture is much smoother without them.)
3. Prepare the Ice Cream Base:
· In a medium saucepan over medium heat, combine the heavy cream, whole milk, and another ¼ cup of the sugar. Heat until it is warm and steamy (around 175°F / 80°C), but do not let it boil.
· While the cream is heating, in a separate bowl, whisk the egg yolks, the remaining ¼ cup of sugar, and salt together until the mixture is pale, thick, and falls off the whisk in a ribbon-like trail.
4. Temper the Eggs (This prevents scrambling):
· Slowly pour about ½ cup of the hot cream mixture into the egg yolk mixture while whisking constantly.
· Gradually pour the tempered egg yolk mixture back into the saucepan with the remaining cream, whisking constantly.
5. Cook the Custard:
· Cook the mixture over low heat, stirring constantly with a spatula or wooden spoon, until it thickens slightly and coats the back of the spoon (around 180°F / 82°C). Do not let it boil.
· You can test it by running your finger across the coated spoon; the line should hold clearly.
6. Chill the Custard Completely:
· Immediately remove the custard from the heat and stir in the vanilla extract.
· Pour the custard through a fine-mesh sieve into a clean bowl (this catches any accidental bits of cooked egg).
· Stir the reserved raspberry puree into the strained custard.
· Cover the bowl with plastic wrap, pressing it directly onto the surface of the custard to prevent a skin from forming.
· Refrigerate for at least 4 hours, or preferably overnight. The base must be completely cold (below 40°F / 4°C) before churning.
7. Churn the Ice Cream:
· Pour the chilled raspberry custard into your ice cream maker and churn according to the manufacturer’s instructions. It will thicken into a soft-serve consistency.
· This usually takes about 20-30 minutes.
8. Freeze to Firm Up:
· Transfer the churned ice cream to an airtight container.
· Press a piece of parchment paper directly onto the surface, then seal with the lid.
· Freeze for at least 4-6 hours, or until firm, before serving.
—
No-Cook (No Egg) Variation: Philadelphia-Style
For a simpler, faster recipe that highlights the pure fruit flavor (though it will be less rich and a bit icier).
· Omit: Egg yolks
· Increase: Heavy cream to 2 cups, whole milk to 1 cup.
· Instructions: Skip steps 3-6. Simply whisk the cold heavy cream, milk, ¾ cup sugar, vanilla, and salt together until the sugar is dissolved. Stir in the raspberry puree. Chill for 1 hour, then churn immediately.
Pro Tips for Success:
· Chill Your Bowl: If your ice cream maker uses a frozen bowl, ensure it is completely solid—frozen for at least 24 hours.
· Don’t Skip the Chill: Chilling the base is non-negotiable. A cold base churns faster and results in a creamier final product with less ice crystallization.
· Raspberry Quality: The flavor of your ice cream depends entirely on the raspberries. Use the best, ripest, most flavorful berries you can find.
· Alcohol Trick: For a softer, more scoopable texture, you can add 1 tablespoon of vodka or Chambord (raspberry liqueur) to the base before churning. The alcohol doesn’t freeze, preventing it from getting too hard.
Enjoy your incredibly fresh and creamy homemade treat! It’s far superior to anything you can buy at the store.