Of course! This is a fantastic choice for a classic, crowd-pleasing meal. A Crispy Cod & Golden Onion Rings Platter is all about contrast: the flaky, mild fish and the sweet, crunchy onions, tied together with delicious dips and sides.
Here is a detailed recipe designed for maximum crunch and flavor.
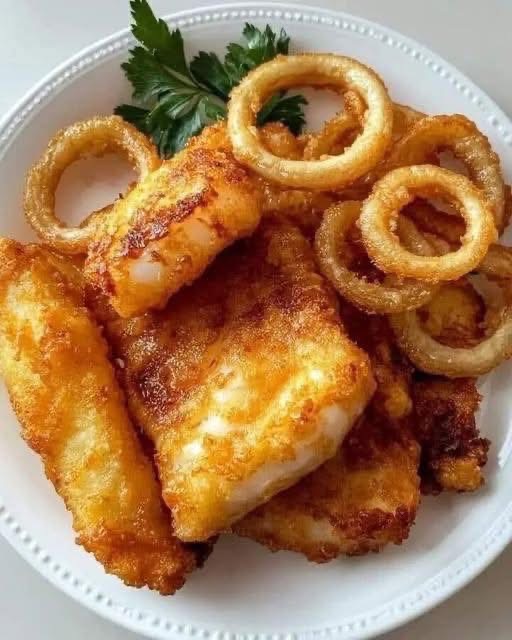
The Ultimate Crispy Cod & Golden Onion Rings Platter
This recipe breaks down the components: the beer-battered fish, the crispy onion rings, the perfect fry technique, and serving suggestions.
—
Part 1: Crispy Beer-Battered Cod
Ingredients:
· 1.5 lbs (700g) fresh cod fillets, cut into 1-inch thick strips or chunks ( patted VERY dry)
· 1 cup (125g) all-purpose flour
· 1 tsp paprika (sweet or smoked)
· 1 tsp garlic powder
· Salt and black pepper to taste
· 1 cup (240ml) cold beer (lager or pilsner work best; seltzer water is a great non-alcoholic substitute)
· 1 large egg (optional, for extra crispiness)
Instructions:
1. Prep the Fish: Ensure your cod pieces are thoroughly dried with paper towels. This is the #1 secret to a crispy batter. Season lightly with salt.
2. Make the Batter: In a medium bowl, whisk together the flour, paprika, garlic powder, salt, and pepper. Take 3 tablespoons of this dry mix and place it in a separate shallow dish (this is for dredging).
3. Combine Wet & Dry: Create a well in the center of the flour mixture in the bowl. Gradually pour in the cold beer (and the egg, if using), whisking until just combined. A few lumps are perfectly fine; overmixing will make the batter tough. Keep the batter cold.
4. Dredge and Dip: One piece at a time, dredge a cod piece in the reserved dry flour mixture, shaking off any excess. This dry layer helps the wet batter adhere. Then, dip it fully into the beer batter, letting the excess drip off.
5. Fry Immediately: Carefully lower the battered fish into your preheated oil (see frying guide below). Do not overcrowd the pot. Fry for 4-6 minutes, turning occasionally, until deep golden brown and crispy.
6. Drain: Remove with a slotted spoon or spider strainer and place on a wire rack set over a baking sheet. Do not drain on paper towels, as this will make the bottom side soggy. Season immediately with a pinch of salt.
—
Part 2: Golden Onion Rings
Ingredients:
· 2 large sweet onions (Vidalia or Spanish), sliced into ½-inch thick rings
· 2 cups (500ml) buttermilk (or whole milk with 1 tbsp vinegar added)
· 1.5 cups (190g) all-purpose flour
· ½ cup (60g) cornstarch (this is the key to extra crunch)
· 1 tbsp seasoning salt (like Lawry’s) or your favorite blend
· 1 tsp baking powder (for a lighter, puffier crust)
· Cold water or club soda, as needed
Instructions:
1. Soak the Onions: Separate the onion rings and place them in a shallow dish. Pour the buttermilk over them, ensuring they’re all submerged. Let them soak for at least 30 minutes (or up to 2 hours). This step tenderizes the onions and helps the batter stick.
2. Make the Breading: In a large bowl, whisk together the flour, cornstarch, seasoning salt, and baking powder.
3. Bread the Onions: Remove a handful of onion rings from the buttermilk, letting the excess drip off. Toss them in the flour mixture, pressing gently to ensure an even, clumpy coating. Shake off the excess. For an extra-thick crust, you can dip them back in the buttermilk and then into the flour mixture again (double-dredge).
4. Fry: Carefully place the breaded onion rings into the preheated oil. Fry for 2-4 minutes per side, until they are a deep, golden brown.
5. Drain: Remove and drain on the wire rack alongside the fish. Season with a little salt right away.
—
Part 3: The Fry Setup – Crucial for Success
· Oil: Use a neutral oil with a high smoke point: canola, vegetable, or peanut oil are perfect.
· Pot: Use a heavy-bottomed pot or Dutch oven. Fill it no more than halfway with oil.
· Temperature: This is the most important step. You need a deep-fry or candy thermometer.
· Heat the oil to 375°F (190°C). This is the ideal temperature for achieving crispiness without greasiness.
· The temperature will drop when you add food. Try to maintain it between 350-365°F (175-185°C) during cooking.
· Don’t overcrowd the pot! Fry in small batches to keep the oil temperature stable.
—
Part 4: Assembly & Serving Platter
Classic Accompaniments:
· Lemon Wedges: A must for squeezing over everything.
· Tartar Sauce: Mix mayo, sweet pickle relish, lemon juice, dill, and a dash of hot sauce.
· Chipotle Mayo: Mix mayo with adobo sauce from a can of chipotles, lime juice, and a pinch of salt.
· Malt Vinegar: The traditional British pairing for fish and chips.
· French Fries or Steak Fries: If you want to go all-out.
· Coleslaw: A cool, creamy, crunchy slaw is the perfect side to cut through the richness.
How to Plate: Line a large platter or wooden board with butcher paper or parchment for a classic “chippy” look. Pile the crispy cod and onion rings high in the center. Scatter lemon wedges around the edges. Serve the dipping sauces in small bowls on the side.
Chef’s Tips for the Best Results:
· Keep Everything Cold: Cold batter + hot oil = maximum crisp.
· Patience with Oil: Wait for the oil to come back to temperature between batches. If it’s too cool, the food will be greasy; too hot, it will burn.
· The Wire Rack: This is non-negotiable for keeping your food crispy on all sides. A baking sheet underneath catches the drips.
· Season Immediately: Food is most receptive to salt right when it comes out of the fryer.
Enjoy your incredible homemade fish and chips platter! It’s a project, but the results are spectacular.