Of course! CRISPY chicken strips are a beloved classic for a reason. They’re surprisingly easy to make at home, often turning out even better than the restaurant or frozen kind.
Here’s a comprehensive guide to making the ultimate crispy chicken strips, covering everything from the basic recipe to pro tips and dipping sauces.
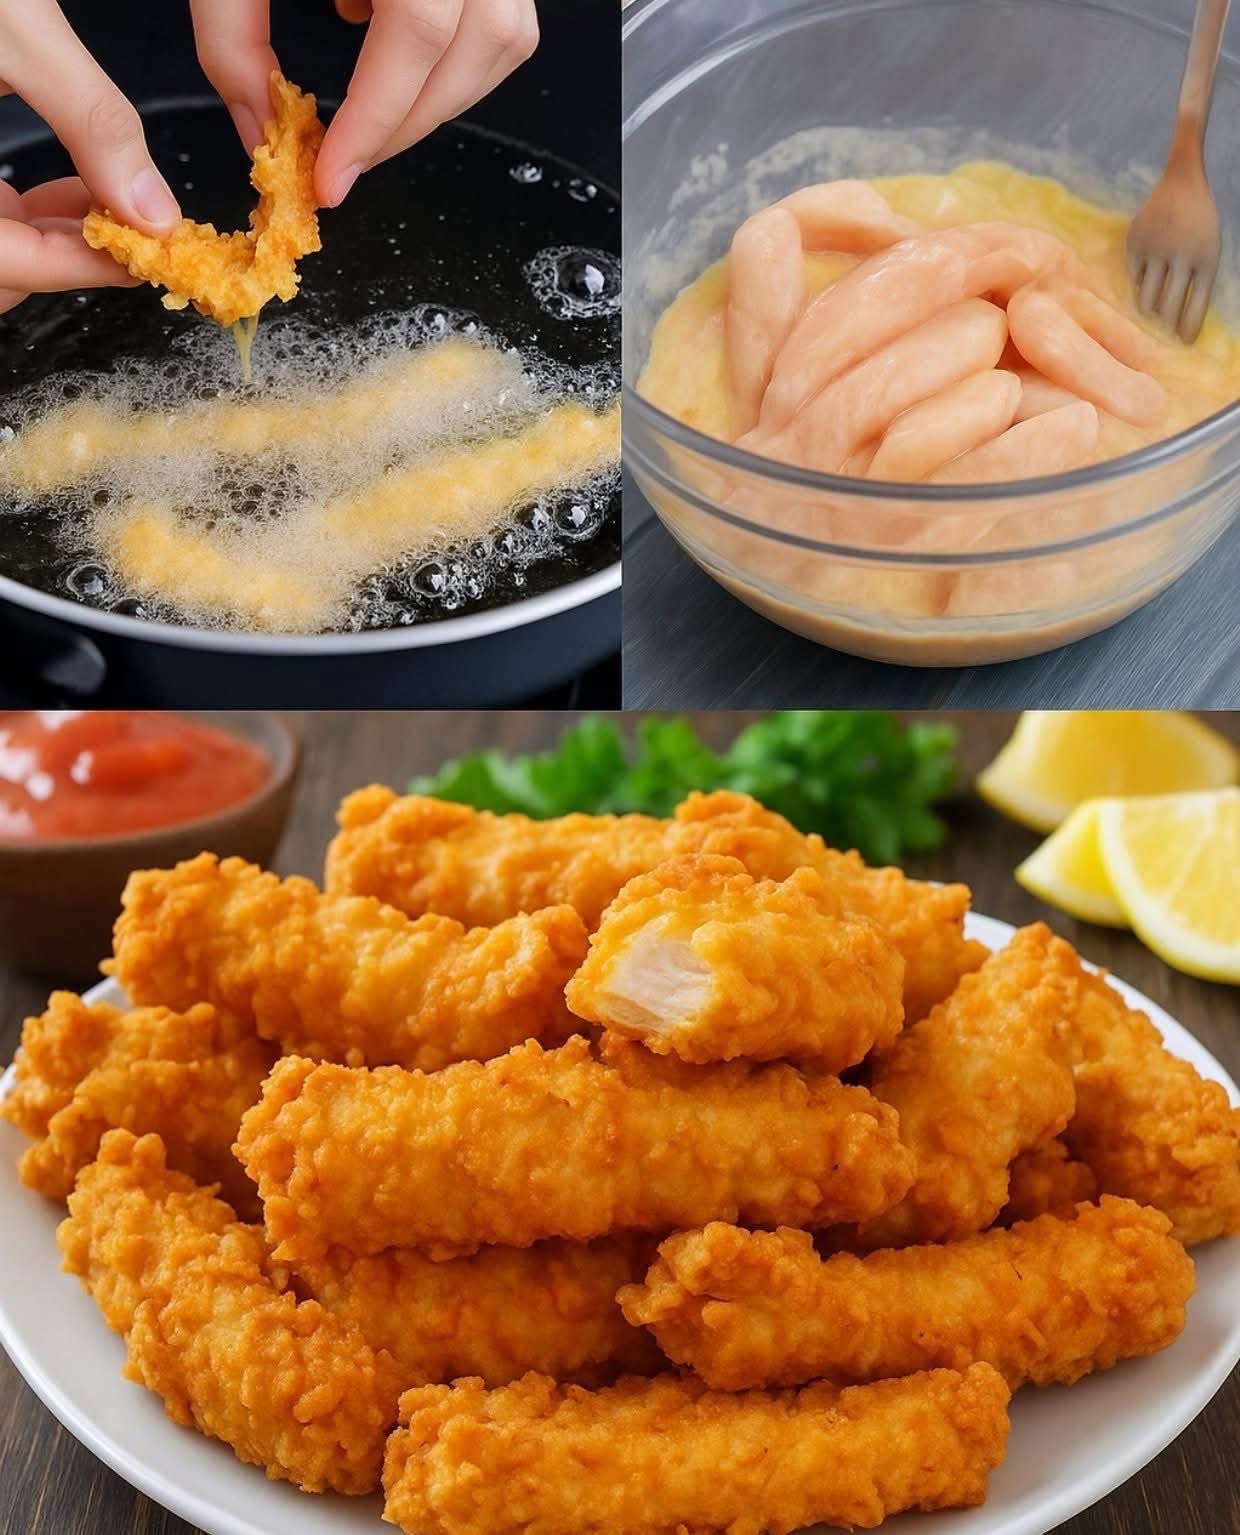
The Ultimate Crispy Chicken Strips Recipe
This method uses a double-dredging technique for an extra-thick, crunchy, and craggy crust that stays crispy.
Ingredients:
· For the Chicken:
· 1 lb (450g) chicken tenders, or boneless, skinless chicken breasts cut into 1-inch strips
· 1 cup buttermilk
· 1 tsp hot sauce (like Frank’s RedHot) optional, but great for flavor
· 1 tsp salt (for the brine)
· 1 tsp paprika (for the brine)
· For the Dredge:
· 1 ½ cups all-purpose flour
· 2 tsp salt
· 1 tsp black pepper
· 1 tsp garlic powder
· 1 tsp onion powder
· 1 tsp paprika (smoked paprika is excellent here)
· ½ tsp cayenne pepper optional, for a little kick
· For Frying:
· Vegetable, canola, or peanut oil for frying (enough for 1-2 inches in your pot/pan)
—
Instructions:
1. Marinate the Chicken: In a bowl, whisk together the buttermilk, hot sauce, 1 tsp salt, and 1 tsp paprika. Add the chicken strips, ensuring they are fully submerged. Cover and refrigerate for at least 30 minutes, or ideally up to 4 hours. This tenderizes the chicken and adds flavor.
2. Prepare the Dredge: In a shallow bowl or pie plate, whisk together the flour and all the dried spices (salt, pepper, garlic powder, onion powder, paprika, cayenne).
3. Dredge Station: Remove the chicken from the buttermilk, letting the excess drip off. Do not discard the buttermilk. You’ll use it for the wet step. Set up your station: bowl of marinated chicken -> bowl of leftover buttermilk -> bowl of seasoned flour -> a clean wire rack or plate.
4. Double Dredge (The Secret to Extra Crispiness!):
· First Coat: Take a chicken strip, dip it back into the buttermilk, then dredge it thoroughly in the flour mixture. Press firmly to make sure the flour adheres well.
· Wet Again: Dip the flour-coated strip back into the buttermilk for just a second.
· Second Coat: Dredge it one final time in the flour, again pressing to create lots of clumpy, craggy bits. This is what will give you that fantastic texture. Place the finished strip on the wire rack and repeat with all pieces.
· Pro Tip: Let the coated strips rest on the rack for 5-10 minutes before frying. This helps the coating set and adhere better.
5. Heat the Oil: Pour oil into a heavy-bottomed pot, Dutch oven, or deep cast-iron skillet to a depth of 1-2 inches. Heat over medium-high heat to 350°F (175°C). Use a deep-fry or candy thermometer for accuracy. If you don’t have one, test by dropping a small cube of bread in the oil; it should turn golden brown in 60 seconds.
6. Fry the Chicken: Working in batches to avoid overcrowding the pot, carefully place the chicken strips into the hot oil. Fry for 3-5 minutes per side, until the coating is deep golden brown and crispy, and the internal temperature of the chicken reaches 165°F (74°C).
7. Drain and Serve: Use tongs or a spider strainer to remove the strips from the oil. Place them on a fresh wire rack set over a baking sheet (this keeps them crispy on all sides). If you must use paper towels, don’t let them sit too long or the bottom will steam and get soft.
· Optional: Lightly sprinkle with a little flaky sea salt right after they come out of the fryer.
—
Pro Tips for the Crispiest Strips Ever:
· The Buttermilk Marinade: This is non-negotiable for tender, juicy chicken. The acid in the buttermilk works wonders.
· Season EVERY Layer: Season the buttermilk marinade AND the flour. This builds flavor from the inside out.
· Double Dredge: This is the single best trick for a thick, crunchy, craggy coating that doesn’t fall off.
· Oil Temperature is KEY: If the oil is too cool, the strips will absorb oil and be greasy. If it’s too hot, the outside will burn before the inside is cooked. 350°F (175°C) is the sweet spot.
· Don’t Crowd the Pot: Adding too many strips at once will dramatically drop the oil temperature. Fry in small batches.
· Use a Wire Rack: Draining on a wire rack prevents the dreaded soggy bottom.
—
Baking Option (For a Lighter Version)
For a healthier alternative, you can bake them. The texture will be different (less shatteringly crisp) but still delicious.
1. Prepare the chicken using the same double-dredge method.
2. Preheat your oven to 425°F (220°C). Place a wire rack on a baking sheet and spray it with non-stick cooking spray.
3. Arrange the coated strips on the rack, making sure they don’t touch. Spray the tops generously with cooking spray or drizzle with a little oil (this helps them brown and crisp).
4. Bake for 15-20 minutes, flip, spray again, and bake for another 5-10 minutes, or until crispy and cooked through. For extra browning, broil for the last 1-2 minutes (watch closely!).
—
Dipping Sauces: The Perfect Partners
A great strip needs a great dip! Here are some classics:
· Classic Honey Mustard: Mix equal parts Dijon mustard, yellow mustard, and honey. Add a splash of mayo for creaminess.
· Creamy Ranch: Buttermilk, mayo, sour cream, dill, chives, garlic powder, onion powder, salt, and pepper.
· Spicy BBQ Sauce: Doctor up your favorite store-bought sauce with a splash of apple cider vinegar and a pinch of cayenne.
· Sweet & Sour Sauce: Pineapple juice, ketchup, brown sugar, and vinegar simmered together.
· Buffalo Sauce: Simply toss hot strips in a mix of melted butter and your favorite hot sauce (like Frank’s).
Enjoy your perfectly crispy, homemade chicken strips